Violinmaker-in-Residence #23
I approach the set up of this violin with expectation and reverence. Bringing the strings up to pitch is breathing life into these bits of wood. I once read in a book about quantum physics that God loves to dance. The strings provide the life energy that will set the wood of the violin to dancing, and perhaps the people who hear it.
The Fingerboard and Nut
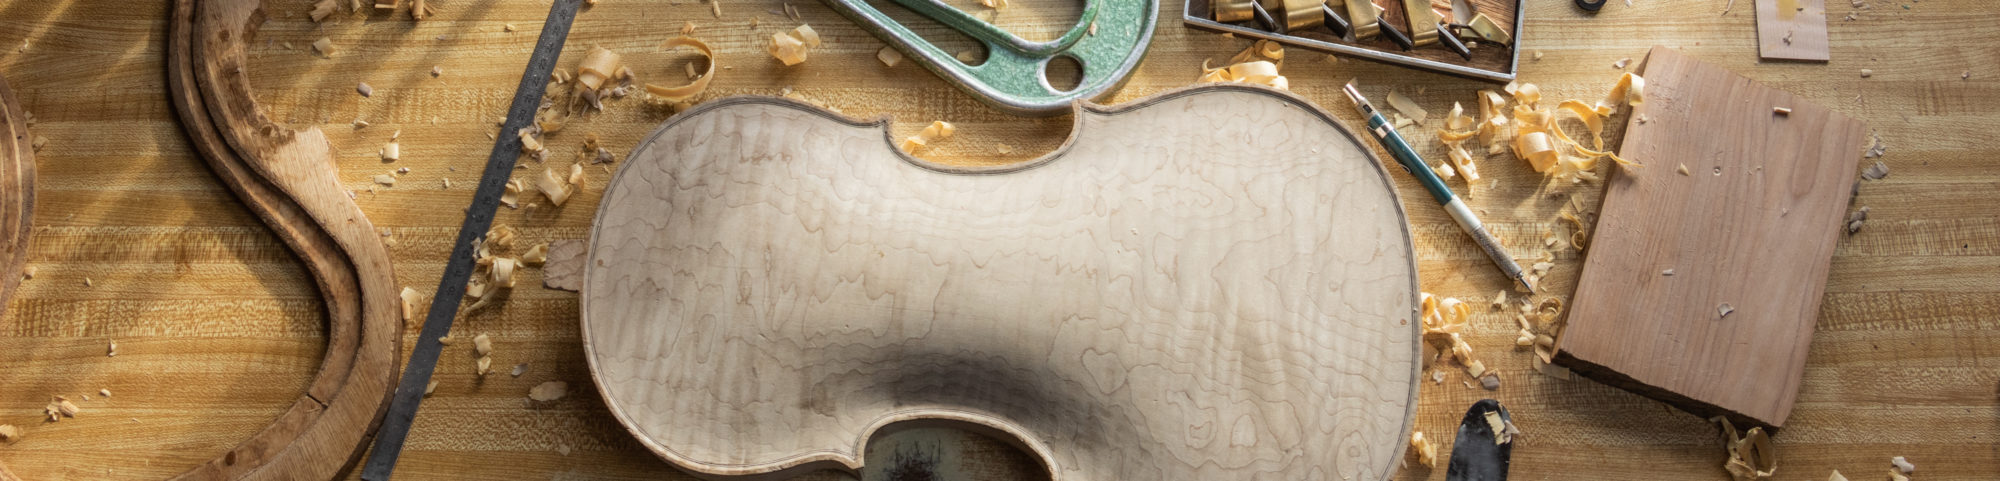
Having completed the varnish, I refit the fingerboard to the violin. It is not uncommon for there to be some movement in the body and neck of the violin since the neck was set and I have the opportunity to make adjustments now. The top surface of the fingerboard is curved to follow the shape of the bridge, and has a scoop from end to end following the vibrating arch of the strings. This provides an even and easy action for the left hand, and free vibration of the strings in all positions. The nut lifts the strings above the fingerboard surface and fixes the spacing of the strings.

Preparing to re-fit the fingerboard and nut.

Preparing the pegs.
The Pegs
The pegs and their holes in the pegbox have a matched taper to allow the pegs to move in and out with changing humidity conditions, and for varying tightness preferences of players. I have a matched set of tools to shape the pegs and ream the holes. I apply a lubricant that helps with smooth action and solid grip.
The Sound Post
In many languages the sound post is named the “Soul” of the violin because it is so important to the voice and life of the violin. The sound post is a cylindrical piece of spruce inside the violin, connecting top and back near the bridge, held in place by friction. The fitting is done with a very sharp knife, and the post is placed with a special tool through the “f” hole using the end button hole as a spy hole, to observe the placement and fit. I pay close attention to how well the post fits the top and back, and how long it is, thus applying the correct tension to the top and back, where it is located in relation to the bridge, and the sound transmission qualities of the wood.
The Bridge
The bridge is of maple and holds the strings above the violin body and fingerboard. Most of the energy from the strings driving the violin body flows through the bridge and it is an important acoustic filter. The material, and design of the bridge all work together to balance stiffness and flexibility.

The fittings.
The End Button and Tailpiece
The end button and tailpiece anchor the strings, with their combined 55 pounds of tension, to the lower block of the body. I chose boxwood for this violin for its lightness, strength, and durability.
The Chin Rest
The Chin Rest is interchangeable and is chosen by the player for their comfort and playing preference.
Violin Diagram
Click here to see a graphic of Violin Opus 934 with its parts identified.
To follow this blog, please send us an email and we’ll keep you informed.
Let me know if you have suggestions of ways to make these residencies more valuable for you. If you have comments or questions, please send them to us via email.